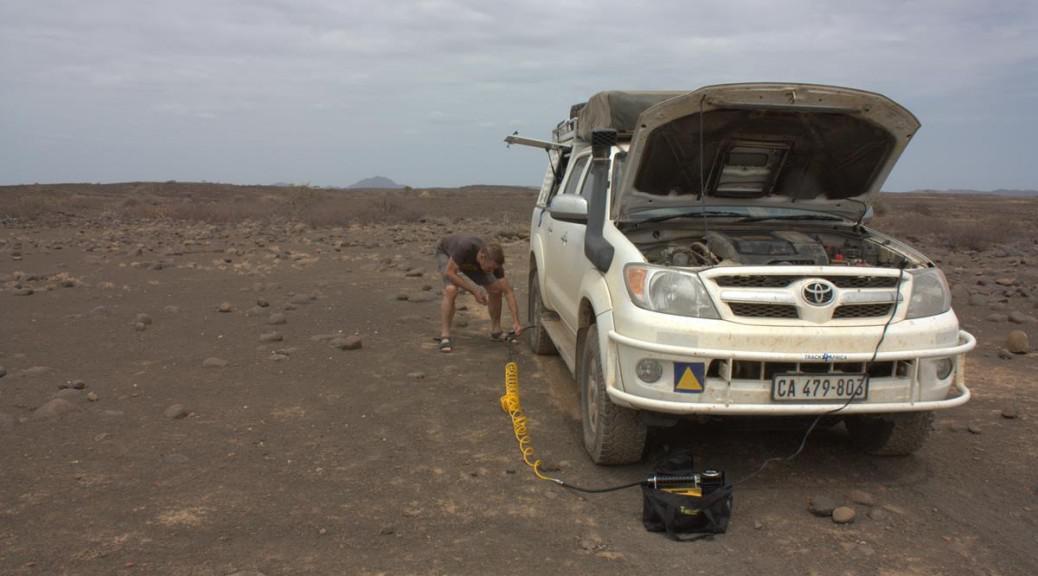
On our recent seven month, 33 000km return trip from Cape Town to Ethiopia, we punctured four rear tubeless tyres, all in the first 17 000km. On one day alone Pete had to use 20 plugs on two tyres and we arrived at our destination well after dark! Next time we go on an overland trip, we’ll go even better prepared…
From personal as well as other people’s experience we have learnt that the risk of punctures increases on gravel roads, where it seems to be a matter of (bad) luck. Various theories exist regarding the best tyre pressure to use but the bottom line is: if there is a sharp object in the path of the tread (possibly made to stand up by the passage of the front tyre or by rain) then there is a chance that it will penetrate the rear tread. No tyres are immune!
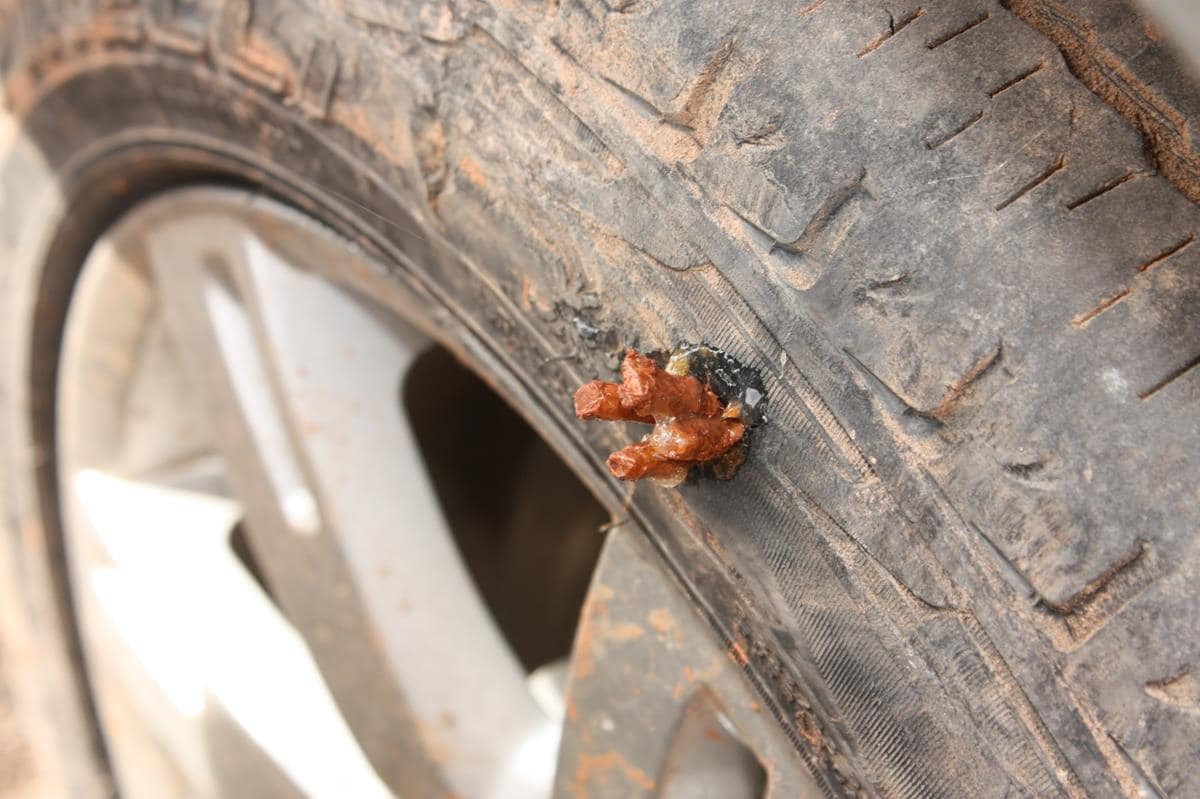
Despite having fitted what were anecdotally the best off-road tyres (BF Goodrich All Terrain tubeless) four of these (all inflated to around 3 bar) punctured on the tread section and couldn’t be permanently repaired using plugs. Initially the plug would stop the leak, but over time on rough roads it would pull out.
Yet we met one couple driving on narrow, standard, cross-ply Michelins and they had never had a puncture on their African travels.
It was only by chance and constant checking that we didn’t ruin a tyre and after the problems we had, we would in future fit automatic tyre pressure indicators. These give one a much better chance of detecting a puncture before the tyre is written off. Also, we only had one spare tyre on a rim and one without. Next time we’d leave with two spare tyres on rims.
What you need to repair punctured tyres
If you plan an overland trip, and especially if you plan on driving off-road, you must go equipped to repair punctured tyres yourself. Ensure that you have the following with you:
- Tyre repair kit (including plugs, tube patches and vulcanising solution) and a pressure gauge.
- More plugs than what you think you will need (try to buy plugs that vulcanise with the tyre to prevent them pulling out)
- Plenty of latex tyre sealant
- Extra tubes
- Mechanical/hydraulic/airlift jacks
- A competent high volume compressor
- 3 Tyre levers
- Commercial gaiter patches (and multiple small tubes of specific vulcanising solution). However, no roadside mechanic we came across knew how to use them and preferred to make their own.
The golden rule is to constantly be alert for any unusual noise and monitor the way your vehicle is behaving. Also check your tyres each time you stop. If you repair a punctured tyre in the nick of time, you won’t write it off.
How to repair punctures
From experience what follows is our recommended approach to fixing punctures on the tread area of the tyre. (If in a jam you can use plugs on the side wall, but this is not recommended.)
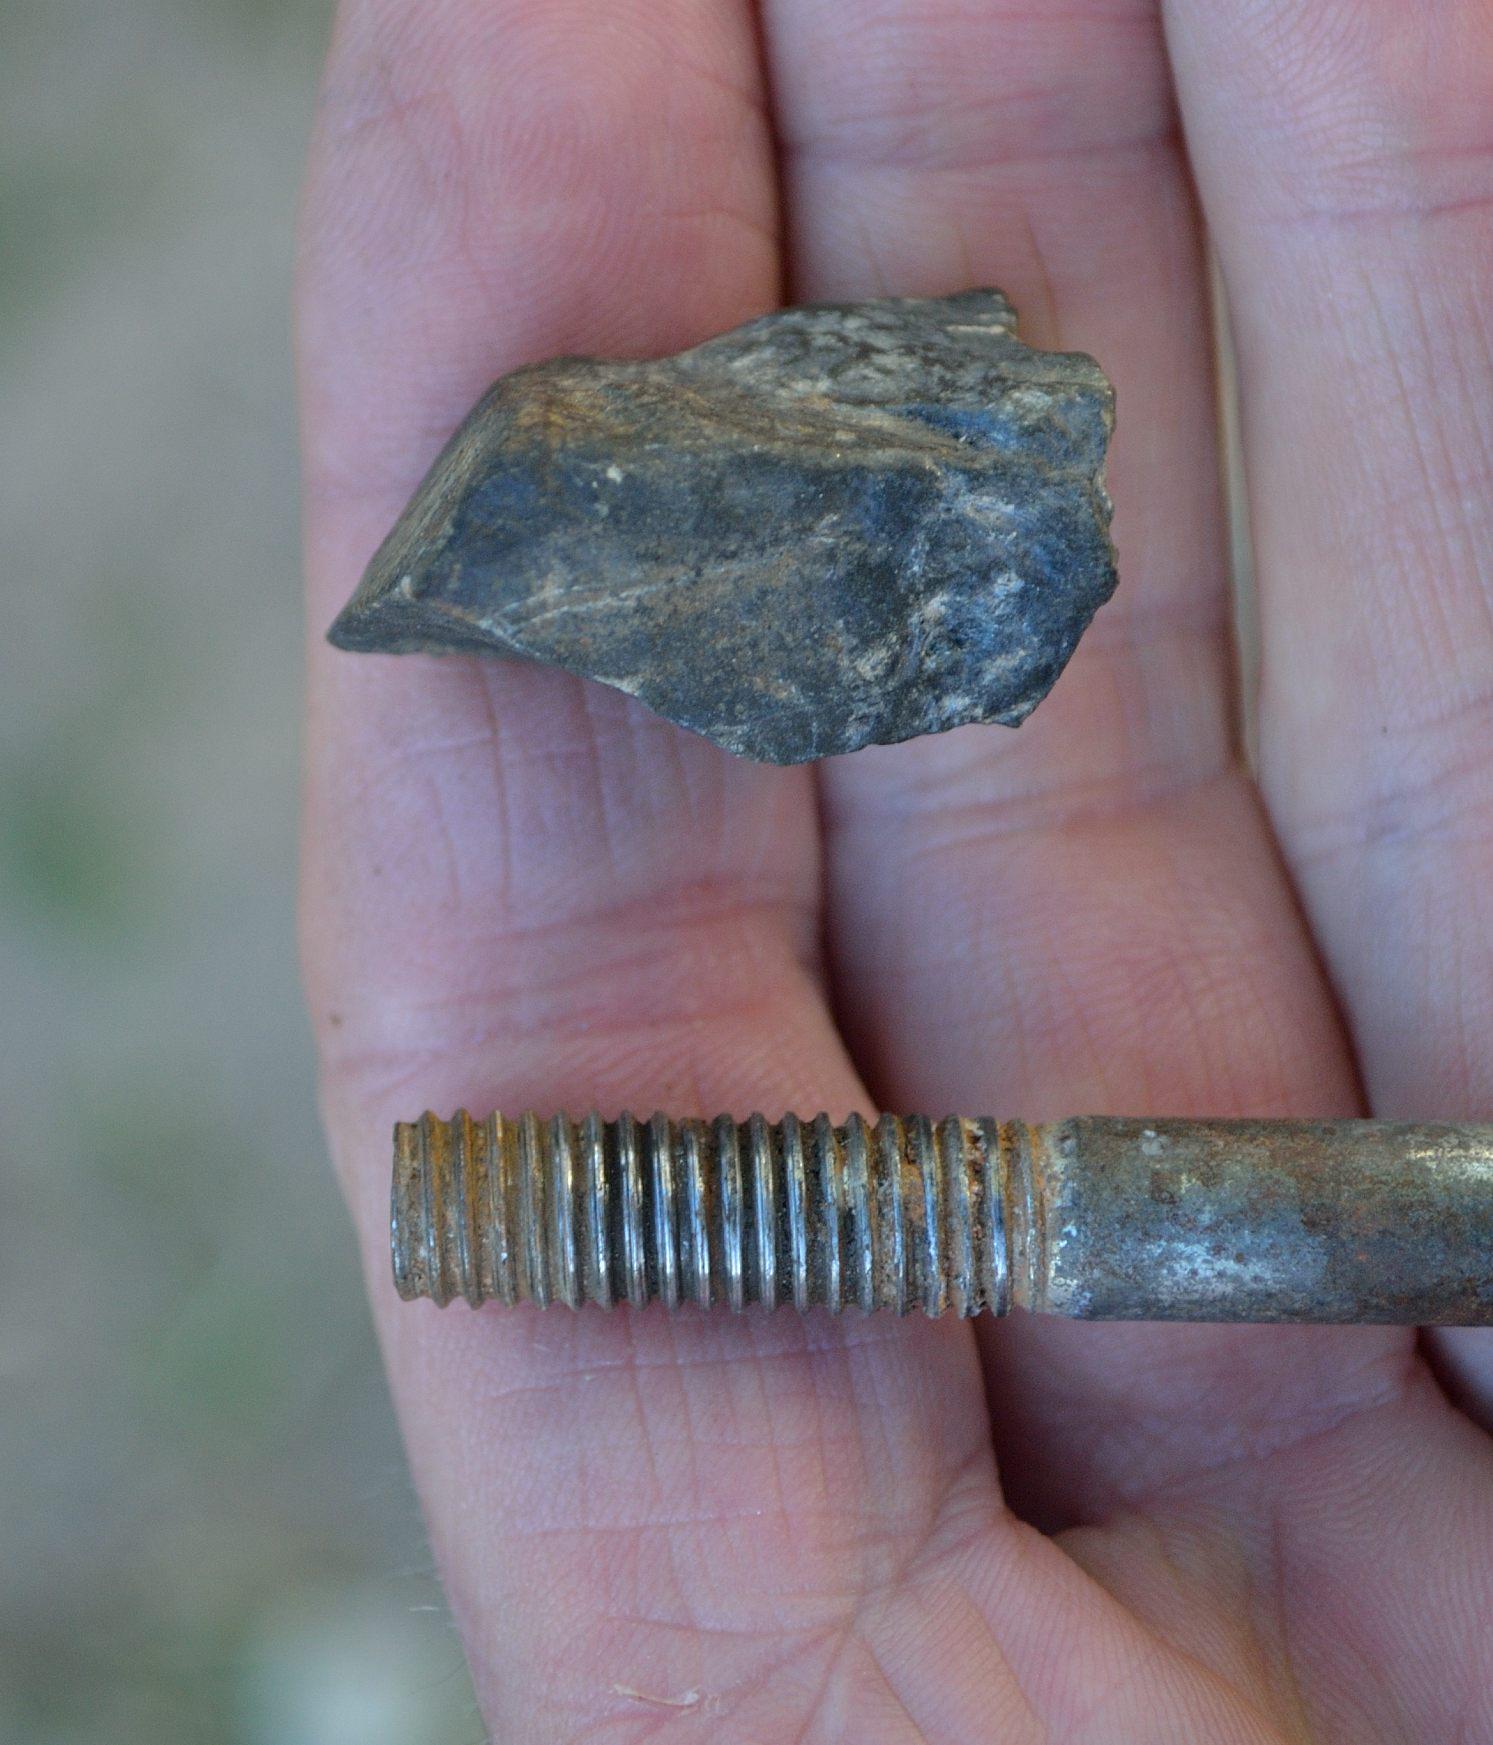
Find the leak in the tyre and remove any object that has penetrated the casing. Then assess how large the leak is, if necessary by pouring soapy water over it. If not too large then rotate the wheel so that the valve is on the side. Remove the valve core and squirt tyre sealant in through the valve stem. Re-inflate the tyre and drive immediately. Stop after a few minutes and check the tyre pressure. Keep checking periodically.
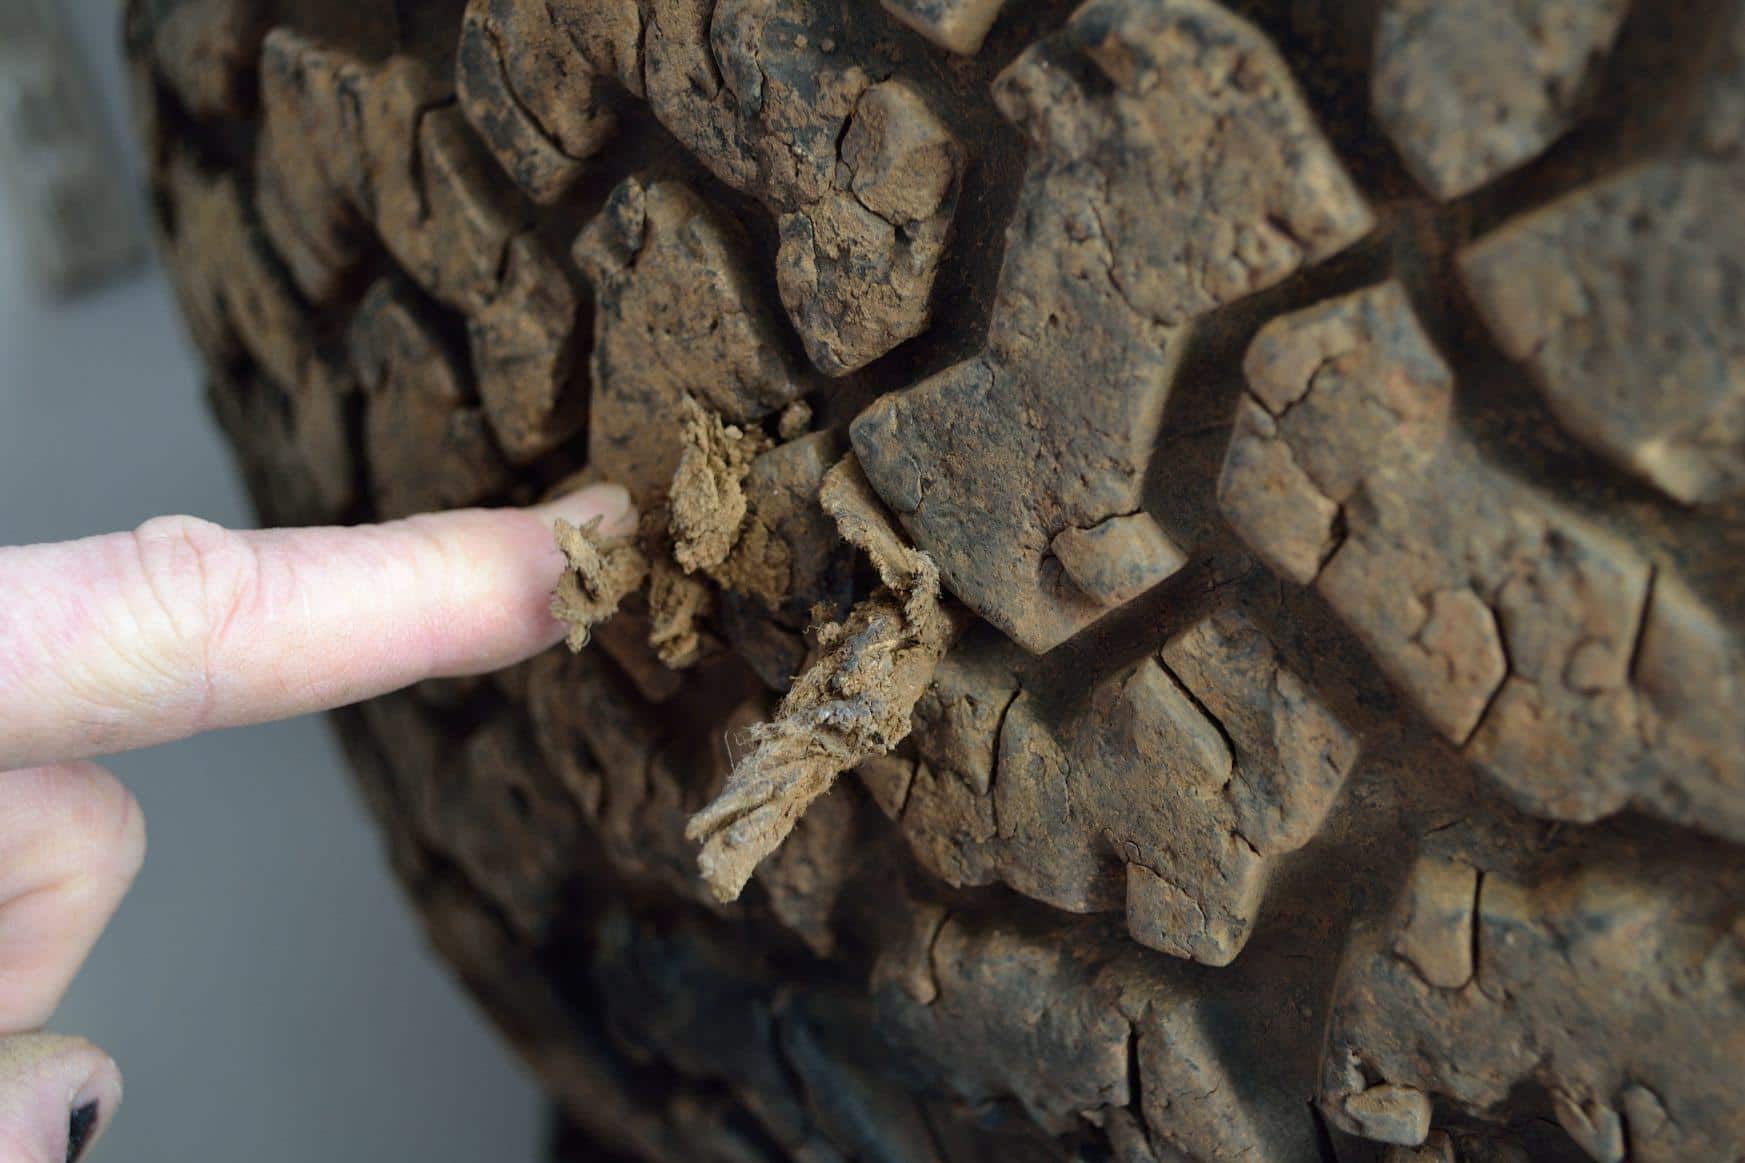
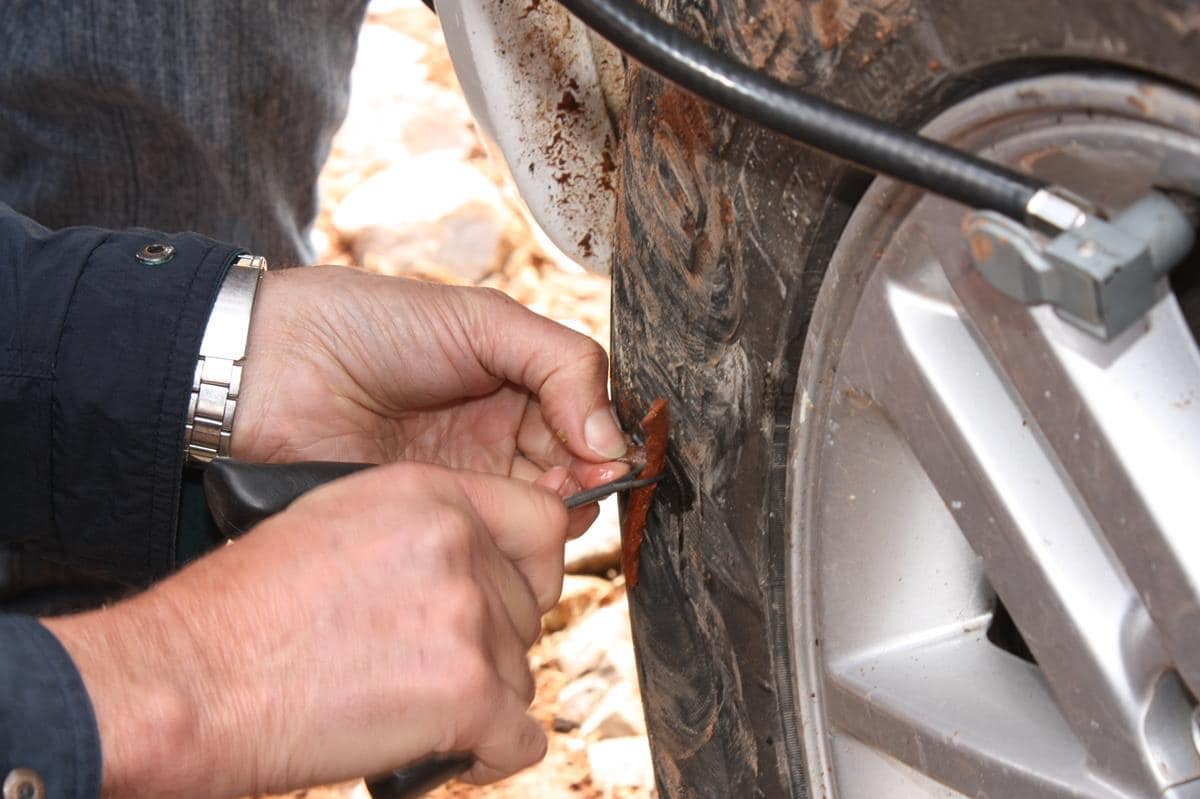
If the leak is too large for the sealant to fix, then force a plug into the hole. Suppliers of these kits recommend reaming out a small hole to make it large enough to take the plug. We have found that doing this just increases the problems of sealing the tyre. Rather be sure to locate the exact site of the hole and force the plug in, if you can without reaming (and without making another hole alongside the puncture itself!). Then cut off the protruding excess to the level of the tread.
If you have to use two plugs, then get someone to hold the protruding ends of the first plug with side cutters to prevent it from being pushed all the way in whilst you force the second plug in alongside it. You may have to remove the wheel to get the leverage required to do this.
Take care when you jack up the vehicle. See the section on ‘Jacking up your vehicle’ in the Bush Mechanics blog article.
When convenient, remove the tyre from the rim and insert a large cable tie into the loop of the plug (inside the tyre). Pull the cable tie tight and cut off the excess. Then re-seat the tyre, put sufficient tyre sealant in through the valve stem, inflate and drive, checking tyre pressure regularly. The use of sealant helps prevent dirt being gradually forced in alongside the sealing surface of the plug which would allow air to escape.
If this procedure doesn’t seal the tyre then get a gaiter fitted at one of the myriad of African street side repair shops. This is usually done as follows: a piece of thick rubber inner tube is cut into a circle, roughened and cleaned of all dirt on a grinding wheel. Then the perimeter is chamfered to a thin edge. A rotary grinding tool is used to abrade a large enough area around the puncture site on the inside of the tyre. This is to remove ridges and residue of mold release agent that may prevent a bond. The gaiter and the area to be patched are coated with contact glue which is allowed to dry and then the gaiter is placed in position and hammered flat with a round ended steel bar to form a seal.

If you have faith in this repair you can either use the tyre in tubeless mode or, as we did for our spare, insert one of the tubes that you take with you. (Note: fitting a tube in a tubeless tyre is not recommended and should only be used to get to the next town. Travel slowly!) The mechanic doing this job for us indicated that the gaiter may seal for between 500 and 1 000km, depending on the road surface. For this reason we preferred to use a tube but have not yet needed to put the tube and gaiter to the test.
We’ve heard that tubeless tyres can rotate on the rim which could put stress on the valve stem or cause heat to build up and rupture the tube. Furthermore, if there are any sharp surfaces inside a tubeless rim then these could cut the tube and cause a blow-out.)
Before re-inflating a tyre, make sure that the sealing surfaces are free of sand and dirt. If not, jack up the vehicle and clean the tyre and rim. If the tyre won’t seat on the rim, then sit with your legs on either side of the tyre, keep applying air pressure and pull it towards your chest from both sides.
Never use lighter fluid to re-bead the tyre as this could explode and damage the rim, at the least. A quick way to inflate a tyre is to remove the valve core, overinflate and then quickly insert the core and adjust to the correct pressure.

Tyre side wall plugs are apparently even less permanent than those used in the tread area. If you are not confident with any repair you should drive slowly as a tyre blow-out could be dangerous. This is especially so with the greater depth of a high profile tyre which will cause a significant drop to the ground.
If you are concerned about tyre life then it may pay you to re-balance the wheel when possible. The best way to learn how to use tyre levers is to watch African mechanics doing this on the side of the road. With technique and muscle they make short work of a tyre change.

I think you are right. Punctures are largely about bad luck. But its also how fast you drive and how carefully you drive. Learning to be vigilant is a skill that comes with experience. Low tire pressure makes your tire wall more vulnerable. Especially in rocky terrain or driving on gravel through drifts.
Great drive, for us we do the entire trip on bikes from Egypt to S.A, I know what it means you get a puncture in the middle of nowhere. This is a good article.
In December 2014 I did Windhoek to Nairobi through Zambia and Tanzania in 4 days. The 2013 Suzuki Grand Vitara towing a trailer. I had filled the tyres with nitrogen. After 4100km the tyres had reduced with 2 bars each.
It is worth noting that, although our tyres were inflated to 3 bar for most of the trip (we only deflated in deep sand) we didn’t get any punctures during the second half of the 33 000km trip. In other words, no punctures for at least 17 000km, even though we still traversed challenging roads. Also, the tour operators in both the Serengeti and Danakil Depression told us that they drive on 3 bar. To us it seemed like punctures are a matter of draw of the luck.
Me and my wife did 9000km’s during the December holidays over and through the worst that Namibia, Botswana and Zim could offer from Johannesburg including Kagalagadi – from Mabua to Nossob, Sossusvlei, Swakop beaches, from Palmwag to the Hoanib and Hoarusib river bed trails, Puros canyon, the horrendous road from Oitjo to Opowu and whatever the Caprivi and it’s parks could offer, Chobe and back to Johannesburg. We travelled in my Ford Ranger with a rooftop tent, carrying two fridges, two dual battery systems, 80 liters extra diesel and 110 liters of water and my tyres are Conti AT’s. More than half these kilometres were on dirt/sand/stone/mud roads and standard procedure was to deflate to 1.5 all round as soon as we left the tar. Wrote off one tyre on a ugly almost invisible rock just outside Palmwag on the Crowther’s trail and had one slow puncture – fixed with a plug. We never even remotely got stuck and made lightweight of some ugly corrugated roads.
well we did app 39000 km. On tar 2.5 bar and gravel and rock 1.5.
had 265 x 70 x 16. next time will go 245 x 75 x 16.
we had one puncture, piece of steel in campsite.
greetings and safe travels. fanie
3 bar is looking for trouble! 1.4bar in my 110 on any gravel and bad roads, front and back.
I think, 3 bar is way to much for these roads…
Past year I drove up to Kilimanjaro from Cape Town and back, 3 months and 20 000 km. I did the Serengeti and I promise you no road is worse than the Serengeti. I had no puncture at all and I have still the same Maxis MT 265/75/16 under my Land Rover defender. My tyre pressure on gravel and bad roads was all the time not more than1.3 in the front and 1.5 bar at the back
and my car was more than 3 tons. luc@mooibly.com