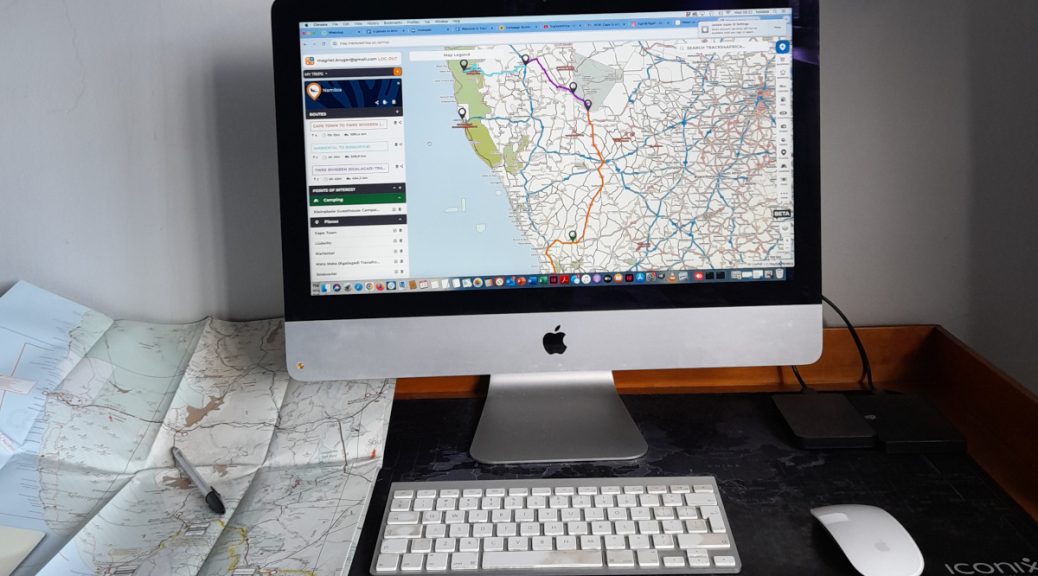
We’re proud to launch the Tracks4Africa online trip planner in a Beta version. Now overlanders can get instant route suggestions with accurate distances and travel times.
The Tracks4Africa online trip planner in Beta answers an age-old question: What is the best way to get there? Overlanders know that not all roads in Africa are created equal. Just because a road is tarred does not mean you can travel 100km/h on it. And the same 50km distance can take anywhere between half an hour and half a day depending on the road surface and conditions.
Tracks4Africa maps have always shown overlanders accurate distances and travel times based on real traveller data – not guesswork. The new online trip planner on the Tracks4Africa website takes that invaluable information to instantly work out a route.
Johann Groenewald, Tracks4Africa co-founder, answers questions about what you can expect from the online trip planner. Learn more about the Beta version and how you can play a role in its development.
What has led to the creation of the online trip planner?
Having a go-to tool for overlander trip planning has always been on my mind. After all, we’ve been planning trips since even before GPS devices. Initially, we created the content – the detailed Africa maps – for Garmin units. As a result, we didn’t see it as an absolute necessity to develop our own trip planner. Then, about 10 years ago, we started discussing it more seriously. But we never had the exact technology available to do it.
Having our own routing algorithm was one of the key ingredients to creating a trip planner. In other words, the little piece of software in the background that calculates the route for you. And how that route is calculated is based on a number of attributes from our maps. Although overlanders have been able to use Garmin products for this in the past, they come with their own routing algorithm. Now we are in a position to provide not only the mapping content, but also do the calculation for a route using that data. And we can manipulate the content and the routing algorithm to work together so you get the best result for a route.
How does route planning differ for overlanders?
Overlanders don’t necessarily want to travel along the highway. As an example, take a trip from Cape Town to Upington. The fastest route would probably be along the N7 and turning off to Calvinia, then following a great tar road all the way to Upington. But if you prefer gravel roads, there’s a very beautiful route that runs through the Tankwa Karoo, which is actually shorter in kilometres. And the time could be similar if you’re in a rugged 4×4. The beauty of the Tracks4Africa online trip planner is that you’ll be able to see that information.
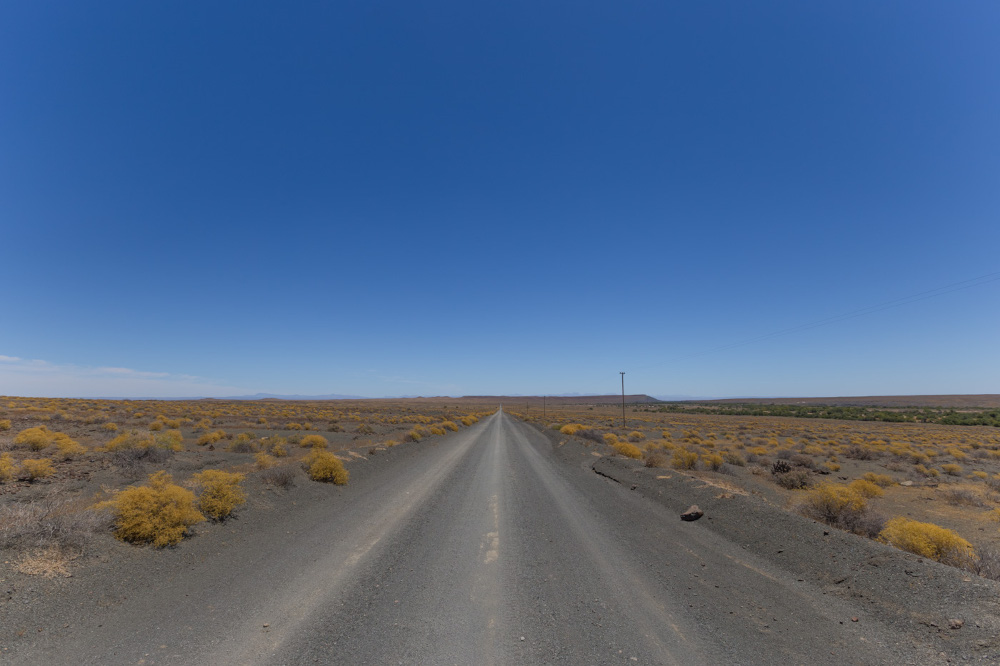
Travellers will be able to choose between the fastest route or the shortest distance based on the information supplied. What’s more, the online trip planner shows you whether the route consists of tar roads, gravel roads or off-road tracks. You’ll also see the time and distance for each road section. So overlanders will know whether it’s mostly tar or more gravel. Those that love gravel travel can then choose their route accordingly.
How do you get started if you want to use the Tracks4Africa trip planner?
The good news is that it couldn’t be simpler. My experience is that a lot of people find Basecamp technically challenging for trip planning. There’s also the fact that you have to install the software and maps on your computer. So there’s a bit of a barrier to entry. With the Tracks4Africa online trip planner, you land on the website and you can start playing straightaway. You can’t really make a mistake and you can simply start again if you want a different option.
On Basecamp, there are so many settings that people can sometimes get things wrong. They have the incorrect avoidances or route preferences set up. Then, when they get route calculations, they don’t really make sense. So we’re hoping to simplify that.
Anyone will be able to visit the site and create trips and routes. But if you want to save a specific route, you’ll have to create an account so we can store your data. If you come back in future and log in with your user account, you’ll find your trips waiting there for you.
What is the process for planning a trip?
A trip is basically just a collection of points, for example, your location, your destination and some stops along the way. Let’s say you enter your home location and a campsite – the trip consists of a route between those two points. If you want to travel a specific mountain pass, you can add it in as a via point, or a stop in between. The online trip planner shows you the time and distance for each segment. So you can see whether it’s worth it to actually add three hours for one via point. It works a bit different from other systems where you simply start by adding points and a route is calculated. We use three basic concepts in our system: trips, points of interest (POI) and routes.
The kind of trips we undertake are normally spanning over several days or weeks, therefore a trip is the collections of points you want to visit and routes you will take to get to these points.
You start off by creating a trip, then search for and add points to your trip – no magic will happen just yet. When you have a couple or more points you can go ahead and create a route. Once the route dialogue is open you will see your points ready to be added to the route. Add two or more points to a route and the system will start to calculate the time and distance between them. You will also see a breakdown of road types and things like border and ferry crossings if present in your route.
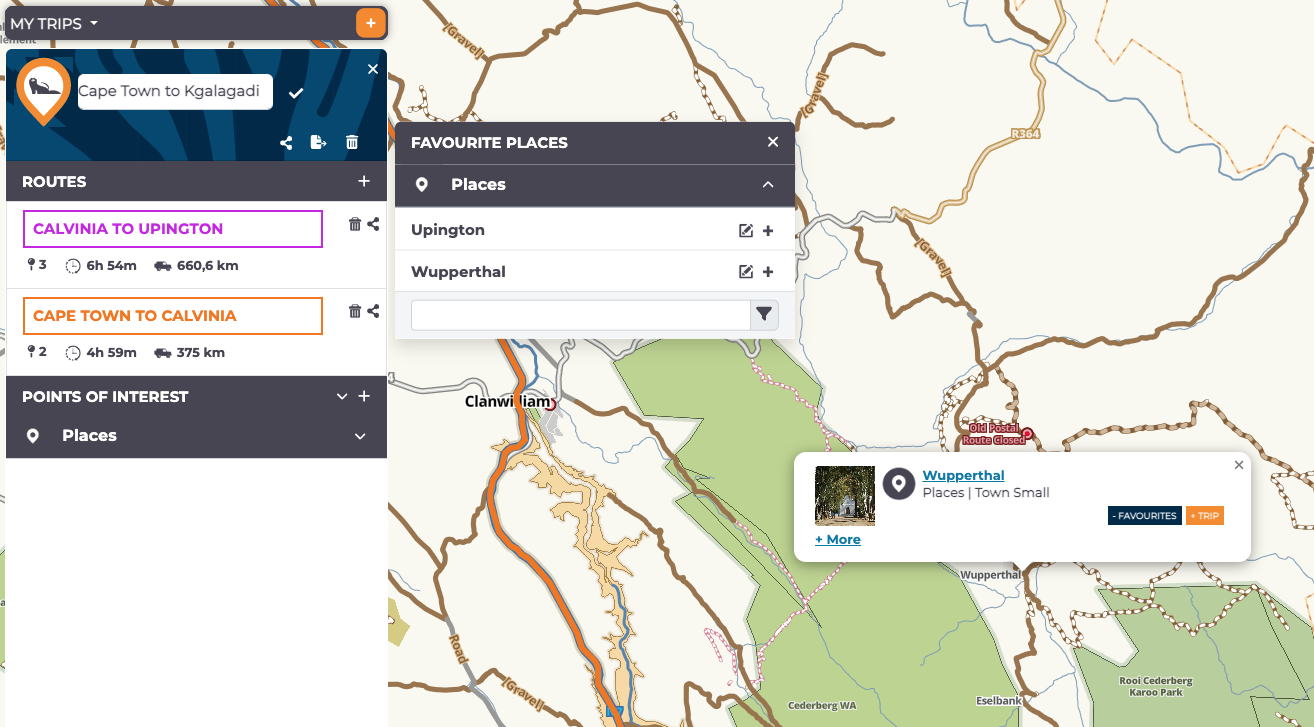
A functionality we think users will find useful is the ability to add favourites. Whenever you’re browsing the online Africa trip planner map and you see a point of interest you like, you can favourite it. So over time, you can build up a collection of places you want to visit. You might start out your planning for a trip to Botswana by just collecting points without working out a route. And if someone mentions a place that’s worth visiting, you can add it to your collection. Then when the time comes to plan your trip, you can string your favourites together to create a route you want to drive.
How do you go about using your planned route?
You can simply download the result of your trip planning as a GPX or KML file. A GPX file is generally what people want for their Garmin GPS. The KML file you can take to various other apps or even into Google Earth or Google Maps. You can also download your trip and mail it to your buddy travelling with you.
Another way to use it will be to sync the trip to your Tracks4Africa Guide App. If you log in with the same account on the T4A Guide App as on the online trip planner, you’ll be able to see all your planned trips. You can then decide which of those trips you want to sync to have available offline on the T4A Guide App.
This is billed as the Beta version. What does that mean?
The Tracks4Africa online trip planner is essentially a work in progress. We hope we’re going to get a lot of feedback from our community of users that will help us to further enhance the system. We want to know which functionalities work and which we need to adapt. We have lots of ideas for extra features.
The Beta version is also available free of charge, but we do want to move the trip planner to a subscription-based service down the line. There are several reasons for this, first being the obvious business case for our company, but also to ringfence paying users and direct their traffic to a dedicated server setup that would allow adequate processing power for route calculations and map views in the background.
If the trip planner can pay its own way, then further development will be warranted and we can realise our dream of an overlanding–specific trip planner.
What functionalities do you foresee for the future?
When we get to phase two, three and four of the online trip planner, there are several options for additional features. One would be to have several users collaborating on one trip. I think a collaboration function would be quite handy since you often have a number of families or couples travelling together. We might also have a way to distinguish between a private and a public trip plan. [In the Beta version, trips are private to individual users.] A tourism board that wanted to promote their backyard could create a public trip like “Karoo Back Roads”. Anyone would be able to take that route and travel it. It’s also technically quite possible that we could add a “Call a friend” button so one of our admin staff could assist you.
Throughout the years I have always received questions from users who want to plan their routes but drive gravel roads only. Then there is the concept of scenic routes as well – think about all our mountain passes. The routing algorithms used currently always favour the ‘best’ route according to time or distance. I want to have our mathematician in the background play with the various weighting options of scenic and ‘lekker’ routes to tweak the trip planner so that it calculates routes that favour these options (if you wish) – I wish!
We would really love to get users’ feedback on what they think about the online trip planner in Beta. This will influence our development in the future, much like our community of users dictated the development of our maps over the past two decades.
How to get started
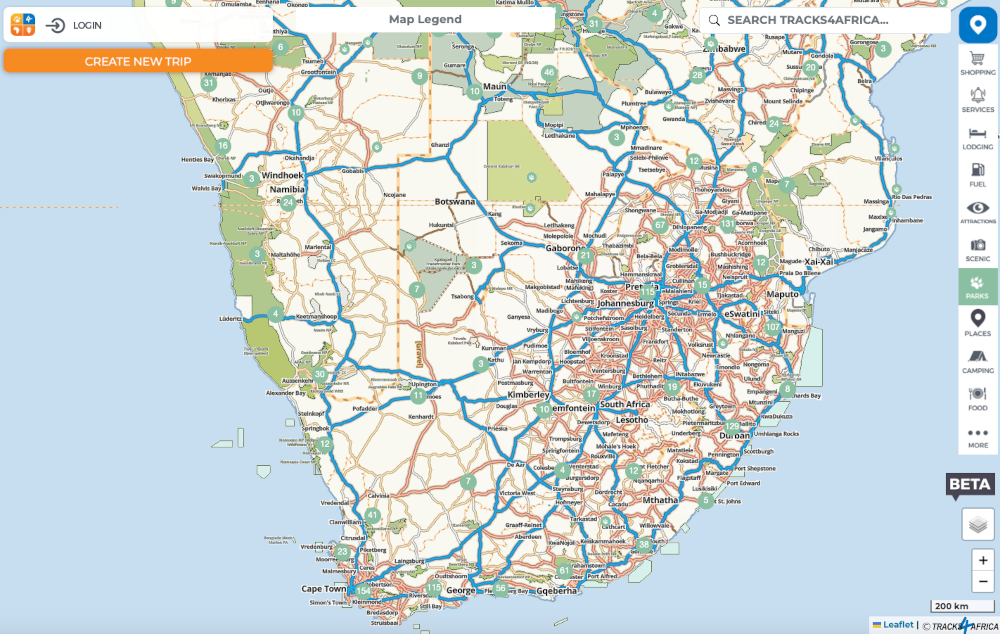
- Click on trip planning in the top navigation bar on the Tracks4Africa home page.
- To save your trip, log in or register with your email address and password.
- To create and name your trip, click on the plus sign next to “My Trips”.
- Add points of interest (POI) on the trip by using the search bar in the top right hand corner.
- Search for places or specific POI such as campsites, attractions or fuel stops. Click on the waypoint icon in the top right hand corner (next to search) to view a list of categories. You can toggle specific POI on or off.
- Choose a point and add to your trip (orange button). You can also add POI by clicking directly on the map – zoom in to be precise.
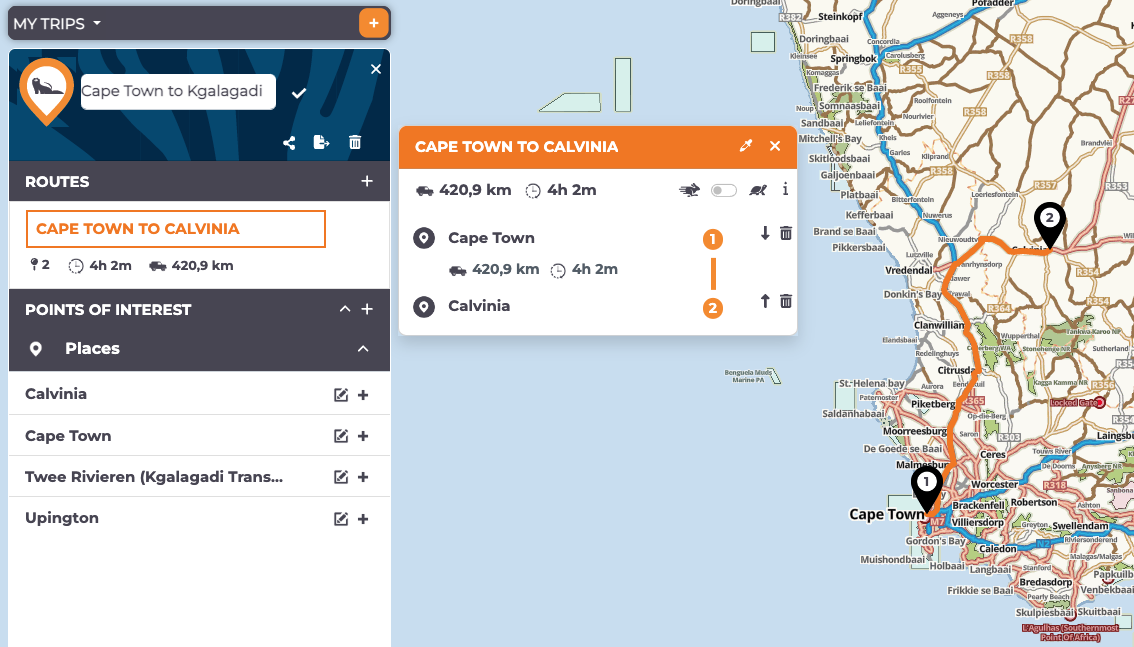
- Once you have chosen your POI, start to build the routes (stages) of your trip. For example, a trip to Namibia might have one route from Cape Town to Kgalagadi and another from Kgalagadi to Mariental.
- Under Routes in the left sidebar, click on the plus sign to add a new route.
- Add waypoints by selecting from your POI. Choose the option to add to route (grey button).
- Once you have two or more waypoints, you will see the distance and travel time between each point on the route. You can toggle between the fastest option (rabbit) or the slow (but usually scenic) route (tortoise). Highlight a leg to view how much of it is on gravel.
Happy trip planning!

Love the T4A trip planner, easier to use than Basecamp and I think most features of Basecamp I would never use. Is there any plans to make an offline version of trip planner? As it would be nice to use while out in the bush without signal.
Hi William, yes there are plans for an offline version. We actually made good progress on this already by rewriting our routing code in a more efficient coding language. This will be realeased onto the website shortly and it should have the effect of improving calculation times and be more accurate as well. From there we aim to bring it into a new version of our app that will act as an offline companion to the online trip planner. When you may ask? Cannot say, but we are working full steam.
Excellent tool. Just used it to plan a 30 odd day overland journey. Only complaint I have is that the server in the back-end needs to be beefed up. Way to many delays, hangups and unresponsiveness as the distance of the journey increased i.e. more POI and longer route data. Definitely not the connection to the server, tried it on several different connections, all above 100Mbps, but problems persisted. Otherwise a very valuable tool.
Mike, thanks for your input! I will relay this info to our development team! We are still working on our Trip planner – but all this feedback is most welcome!
I have prepared my trip on my desktop – after some difficulty and now I would like to sync with the T4A navigation App on my tablet . The Instructions ae to go into the App and top right corner go to MENU… I can’t find a menu bar . Can someone help
Note that trips sync to the Tracks4Africa Guide App, not the T4A Navigation App, which has been discontinued. We’ve sent you an email to obtain a screen shot in case the difficulty is with the Guide App.
How do I add a custom way point from coordinates? I have the coordinates for a place but can not seem to figure out how to add it as POI to a trip.
This functionality is being investigated for the future.
I just downloaded and purchased the africa map 24.04 on my ipad, looks great and its great how I can do my planning on https://map.tracks4africa.co.za/map and download it onto the ipad but how can I share my trip with somebody that will be traveling in another vehicle?
There are two ways to share your trip with fellow travellers. You can share the trip from our Trip Planner as a link. This gives your friend a copy of your trip that they can use on the Trip Planner and download to their own version of the app.
The second option is to export your trip as a GPX or KML file, which you can email. They can use this on their GPS or on any app that can import such files.
I’m struggling to search for and locate street address to add as a waypoint, can this be done?
The search function returns destinations and points of interest (POIs) to overlanders such as campsites, fuel stations, shopping, etc. If the street address doesn’t relate to a POI in the Tracks4Africa database, it won’t show up. To add a specific street address as waypoint, search for the town, then zoom in to street level. Click and hold to drop a pin which you can name.
Hi Tracks4Africa.
Thanks for this great tool. I created a separate Route for each day in an existing trip. Is it however possible to move the routes (in other words Day 1 and Day 2) around in a trip? Thanks
To see the routes (trip stages) in the order you would like, change the individual route names to a sequence such as 1, 2, 3 or A, B, C. To change a route name, click on the name in the sidebar, then click on the name in the box that comes up – this will give you the option to give a custom name e.g. A Home to Kalahari. You can also change route colours here.
Just want to echo the ask for the ability to import a GPX or KML. I just created a trip and want to share it with the rest of the group travelling but sadly it’s not yet possible. I managed to export the trip into my Garmin Drivesmart so they can do the same but it would be great to be able to import into the planner too.
Apart from that, I love this software and everything else about T4A….please don’t stop!
Thanks for the feedback, Marc. It’s useful to know how users see themselves using the trip planner.
Great way to keep T4A relevant. Me like!
Hi
I have found your products very useful over the years and this looks very promising. In trying it I have placed some POIs on a named trip but that is all they remain as – there appears to be no calculation of distances and travel time.
Once you have added POIs to your trip, you need to build your route i.e. the individual legs between the POIs.
Follow this process:
Click on the plus sign next to Routes to add a new route within the trip.
Click on the POIs within your Trip to add the points you want to visit on that specific route (leg of the trip).
When you click on a POI, you have an option to add it to your Route (grey button).
Once you have selected more than one POI, the route will be calculated.
I am thrillred at this development but after logging in don’t see any of the buttons for adding my own POI’s. Currently in Kenya
To add your own waypoints, click and hold on the location where you want to add the POI. This will pinpoint a location, which you can name and save to Favourite Places as well as add to specific trips. Happy travels (and trip planning) in Kenya.
I couldn’t figure out how to get started, but once I had googled this article of yours, I could see that it needs inputted Points of Interest from searching using the Search bar. A help link to this article would have been useful. I came upon your website, thinking of starting planning a tour around Namibia. Having a motorhome, I would like a feature that just used tarred roads ! Good luck with this initiative !
Thanks for your feedback. You may find our printed maps (Atlas, Namibia Paper Map) useful as they clearly show tarred roads as well as points of interest.
I’ve planned a trip, synced it to the guide app (I can see it under My Trips in the menu), but can’t get it to actually show up on the map. Pressing ‘trips’ in the bottom left of the map view does nothing… Am I missing a step somewhere? How do I actually use the trip I’ve planned in the app? Thanks!
Thanks for letting us know about the hitch you encountered. Your query has been relayed to our technical team for clarification.
Hi, I am having the same issue. Once you have synced the route to the Guide App, I can see it on My Trips, but not on the actual map…
Try the following to view your trip on the Guide App after syncing: click on the tick box next to the trip name so that it turns orange. You should now be able to view the trip on the map.
Perfect! It works. Thanks so much!
Hi, I am having the same problem. I have synced, gone to trips, clicked on the trip, it is highlighted in pink with a blue box with a white tick. I see the trip in written format but does not appear on the guide app on my tablet. The box next to the trip name does not turn orange unless I am looking in the wrong place.
Someone from the technical side will be in touch with you.
Thanks for the T4A OTP! The description to start did not help me – the description is not very clear if you have no idea how to start. It took me 10 minutes playing around until I got it going. Once it works, it’s very good. I think it also depends on the internet speed or server how your experience is. It takes some time until various options load and if you do not know that there is a time lag, you might move on and then things do not work for you. So once you know that it takes time to load, then you are good.
I have not tried the export function yet, but so far I like it. Good to have would be the function to drag POIs on the created route up or down, instead of clicking the arrow to move them, or to insert a new POI instead of clicking on the arrow. Thanks T4A
We appreciate the feedback on your experience, as well as the suggestions relating to the POIs. We’re excited about planning overlanding trips with this tool and look forward to you doing so too.
I see a significant limitation to the use of this trip planner. There does not appear to be a way to include my own waypoints into my trip. It would appear that only the list of POI’s provided can be used to plan a trip. That doesn’t help me at all. 😞
You can add your own waypoints to the trip planner. Do a long press (click and hold) on the map where you want to add a via point. A red pin will be dropped at this location and when you click on it, you have the option to save or add this to your trip or route. Give it your own name and category.
The function to import points from a KML or GPX file will be added over time as well.
Do I still have to buy the latest t4a app/card for my GPS or go straight on to online new one?
Also, when I go on my overland trip to bots early next year, how do I add poi or change routes while “offline” in bush.
These tools have different functionalities. Our SD card with GPS maps is for turn-by-turn navigation while on a trip. The online trip planner is for planning your adventure beforehand.
Have already tried out couple of times and i like the idea but it seems quite complicated on uow to get started and create a trip, eventually i got around it but i wouldn’t say am excited to create the routes through the app the whole process could be made simpler and honestly the process is kinda challenging on where to start make the process simpler and the app will be superb. Also make an instruction video on how to do this
We’re delighted that you are trying out the trip planner and thank you for your feedback. Because users have different preferences and interact with online pages in different ways, we rely on user input to finetune the online trip planner. Getting the Beta version to be trialled by more people is central to making it a tool that works for as many people as possible.
Sounds like an exciting new tool that adds value and enables to confidently “attack” that planning.
Question here: Is there a function to direct sync or download the planned route into a Garmin device or into an Android phone or tablet?
I like the idea to plan on the pc and then just push it over to the navi device of choice.
Currently you can export the route in GPX for use on your Garmin device. If you are a registered user, you can sync routes to the Tracks4Africa Guide App when you log in on your phone.