Overlanding Escape recently tackled the north of Namibia on a more than 7,000km overlanding adventure. It was a combination of unforgettable scenery and really challenging roads. But a lot of things didn’t go to plan so I thought I’d share some of the lessons learned from this expedition. By Christoff Eilerd
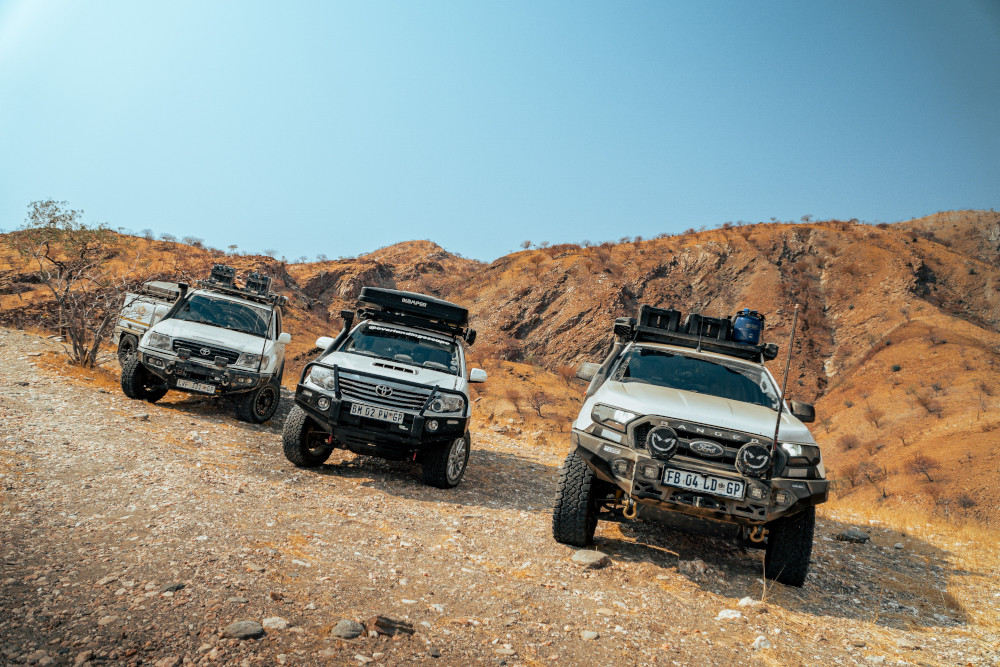
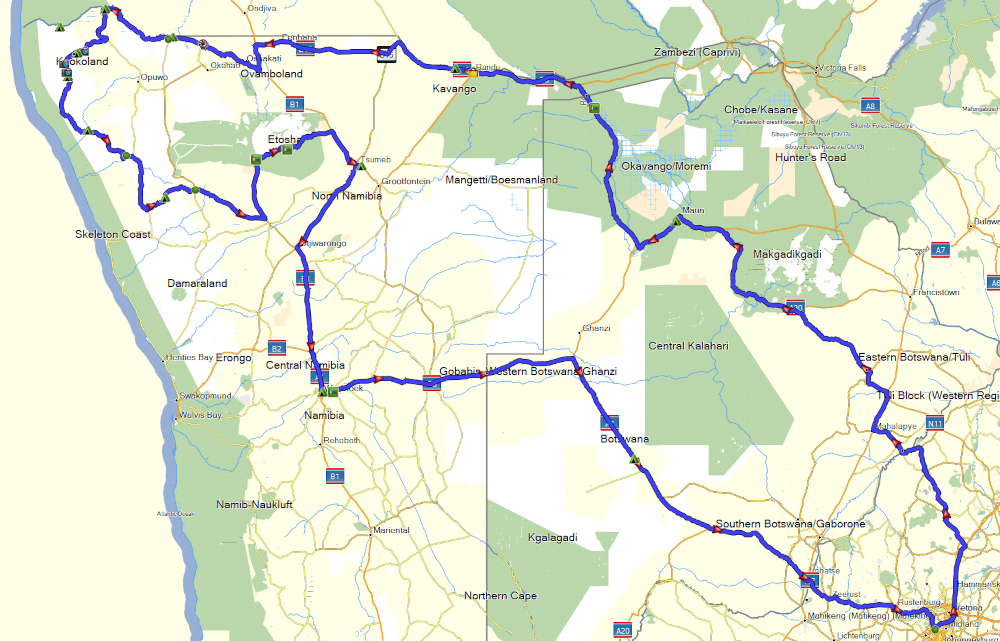
This was the first trip to Namibia for Overlanding Escape – myself, Ed Bath and Ryan Crocker. Our route would take us through Botswana into the Zambezi (aka Caprivi), then along the Kunene River to Epupa Falls. We planned to traverse the infamous Van Zyl’s Pass down to the Marienfluss before heading to Puros and Etosha. From there, we intended to return via the Zambezi and eastern Botswana.
An (in)auspicious start
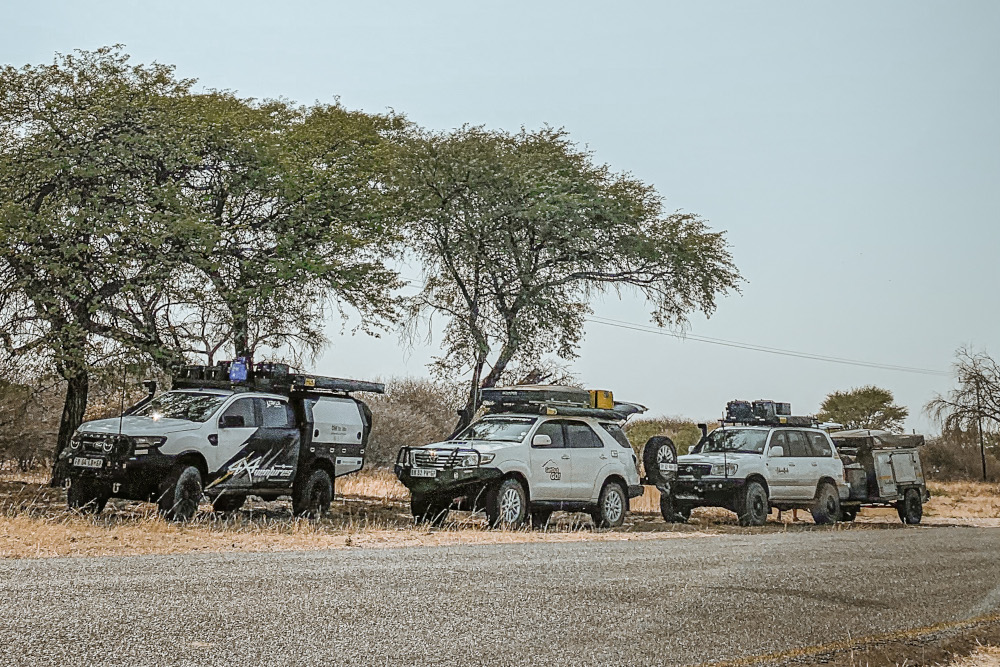
The destination for our first night was Khama Rhino Sanctuary. Since we would be travelling for 30 days and wanted the flexibility to change the route and/or destinations, we hadn’t pre-booked. But arriving at Khama, we found it full – we weren’t expecting it to be this busy outside school holidays. The reception staff agreed we could camp at the picnic site, a day visitor area, and we went for our first game drive. After another stunning African sunset, we returned to discover there had been a cancellation. Not only that, we could camp at number 9, our favourite. A lucky break on our first night of the trip!
The next morning we headed to Sitatunga Camp in Maun, trying to cover as many kilometres to get to Namibia. But about halfway between Serowe and Letlhakane, we picked up a problem. Ed’s fuel light was on: the gauge had suddenly fallen to empty! Based on the kilometres travelled, this was not possible. We checked for leaks but found nothing. However, when we opened the fuel cap, there was a huge gasp for air. It looked like there was an airlock, something the 100 series had never done before. Since we hadn’t filled jerry cans yet and Ed wouldn’t make either town, there was nothing for it: one of us had to get diesel. I headed back to Serowe (as it was a little closer) and grabbed two jerries of diesel. About an hour later we were on our way again.
Lesson 1: Don’t work on your vehicle before a big trip
Most of us are guilty of this one: all those last-minute fixes, services or adding new equipment before a long trip. Just don’t do it! Basic preparation is fine but I suggest doing a weekend trip first after any major work done to your vehicle or equipment. If something goes wrong, you’re close to home so it’s easier (and cheaper) to correct the problem.
On the Okavango River
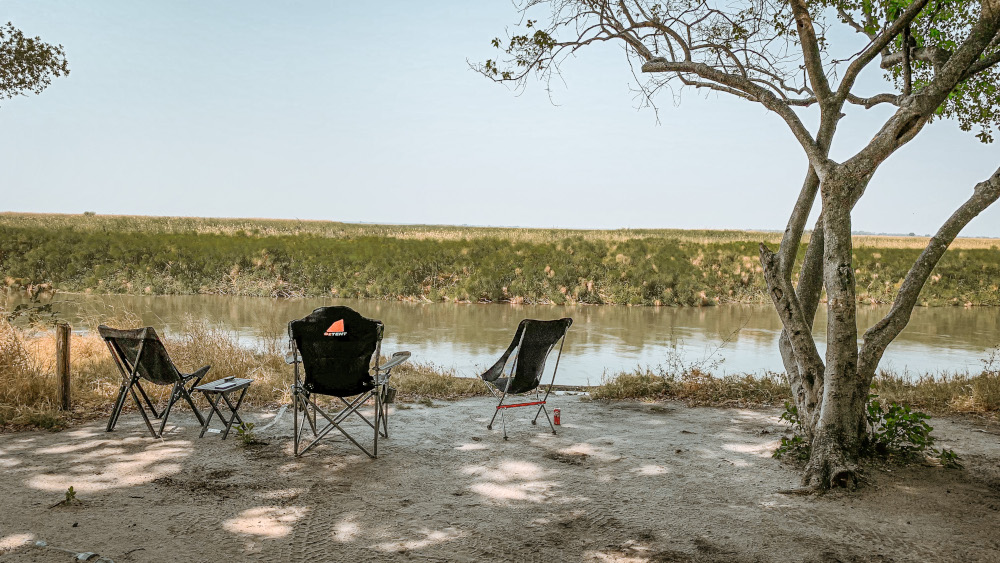
From Sitatunga Camp we made our way to Shakawe River Lodge. Only 359km but Tracks4Africa estimated a five-hour drive. We’d read reports that the A35 was in a bad state and they were not wrong. We came across lots of deep potholes and sections where the tar was completely gone. Although it was slow going, we’ve seen worse. The awesome sight of the Okavango River greeted us at Shakawe – it was finally starting to feel like an expedition.
After two days at Shakawe, we hit the Mohembo Border Post for a straightforward crossing. Soon we were on Bwabwata National Park’s dirt roads. Since we were planning to camp here or at Nambwa on our way back, we pushed on. Little did we know how different this trip would go in the end…
First nights in Namibia
We headed to Rundu to restock, refuel and find our first camp in Namibia. But the drive along the Okavango River was not what we expected. We found it surprisingly populated for a rural area with lots of traffic, livestock and people on the roads. Contrary to what we’d read on online forums, the meat and fresh produce in Rundu wasn’t great. We had expected this area to be wild but it just wasn’t. So after one night, we pushed on to Ruacana.
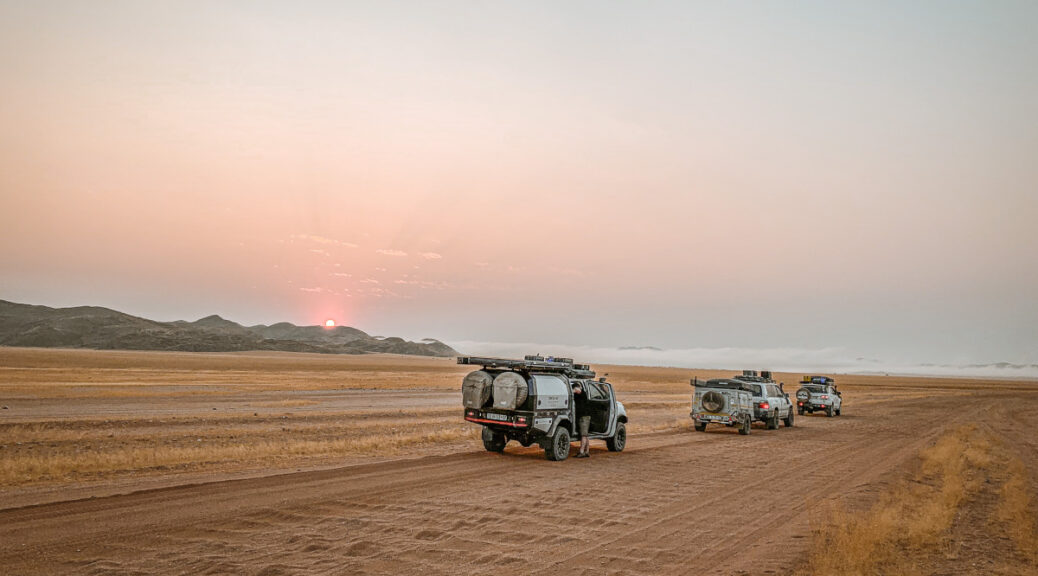
The 650km stretch took forever: lots of obstacles in the roads, slow going and not a lot of scenery. Ombalantu Baobab Camp looked nice, but being smack in the middle of Outapi town, it was not for us. Nearby Okapika is a tented camp, but they let us stay in our own tents in a “kraal”. Although a well-looked after camp, we found it strange to hear both the wild sounds of barking geckos and guineafowl and the domestic ones of goats and donkeys. The next morning we refuelled in Ruacana, the last fuel stop until Puros, some 500km away. There was a renewed sense of excitement as we set off for Epupa Falls – we would finally be hitting dirt!

Lesson 2: Manage your expectations
Based on our research and input from others, we had a well-defined image of what to expect from this area. But this turned out to be completely wrong. People all experience travel differently and social media idealisation of certain destinations doesn’t help either. Don’t over-hype destinations; do your research but rather live in the moment. Take it in as it comes and enjoy the journey.
Destination: Van Zyl’s Pass
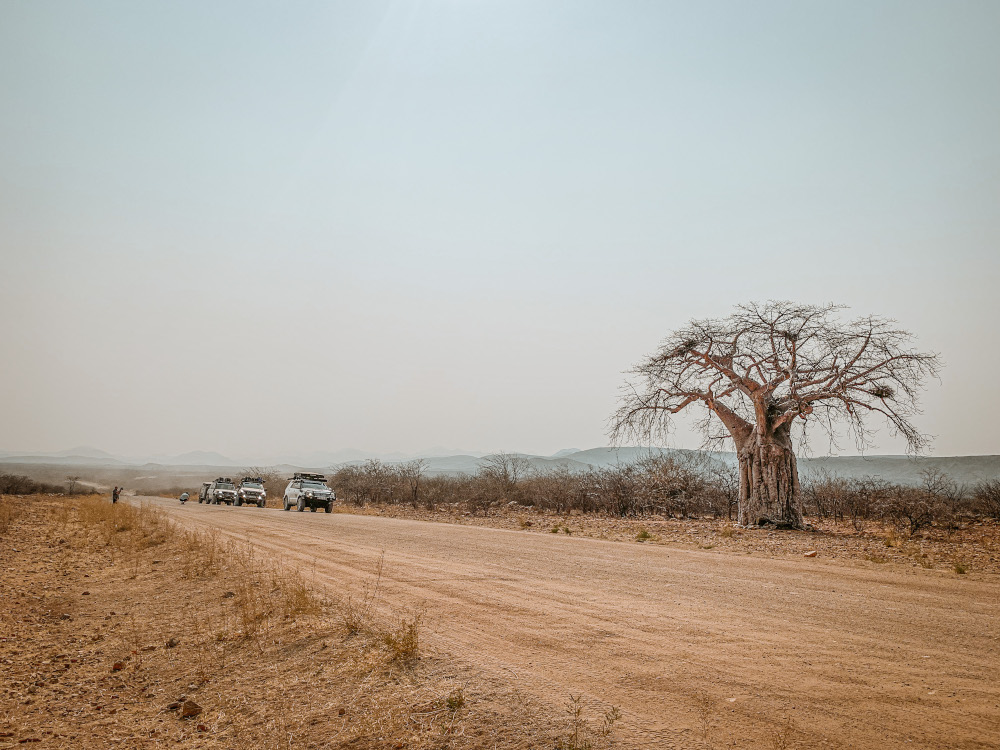
The drive along the Kunene River towards Epupa didn’t disappoint though. Great dirt roads with some 4×4 sections leading right to the river banks. Very desolate but absolutely beautiful. It was a four-hour drive to Epupa, where we stayed at Omarunga Lodge Campsite for two days. Our Namibia series on YouTube captures this stunning scenery.
The next stretch of our journey would be the toughest: tackling Van Zyl’s Pass down to the Marienfluss. The first stretch would take us to the Van Zyl’s Pass Community Campsite. Beforehand, I plotted our entire route out on Basecamp using the Tracks4Africa maps. However, we always get local input as well. A few folks said it should take around four hours to get to the community camp. We thought we might even be able to camp at the viewpoint on Van Zyl’s, about 9km into the pass.
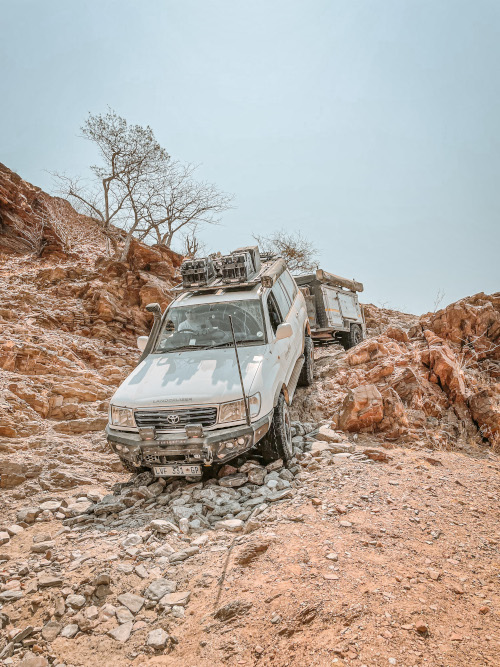
While we had great gravel for about the first 80km, the road then turned into a two spoor. Soon we faced some serious rock steps and a lot of washouts, so needed to spot the vehicles through. On some sections of the D3703, we were going so slowly it didn’t even register on the speedometer. After several tough hours, we reached a place aptly named Heartbreak Hill. It must be a 40-degree incline with lots of off-camber sections, loose gravel, washouts and sharp rock choke points. The sun was already setting when all three of us were finally on top of the hill, several hours later. Going down the other side tuned out to be just as tough, plus we were driving in the dark. When we finally arrived at the community campsite, we’d taken over 12 hours to do around 60km.
The pass itself
As we didn’t know what to expect from Van Zyl’s, we were on the road early again the next morning. The first stretch was okay but it wasn’t long before we were right back into the thick of it again. Lots of rock steps (up and downhill), sheer drops and sharp rocks. Van Zyl’s Pass is only 15km long but should not be underestimated. There are some sections that I would rate as Grade 4 and even Grade 5 in the wet. It took us well into the afternoon to reach the viewpoint, 9km in.
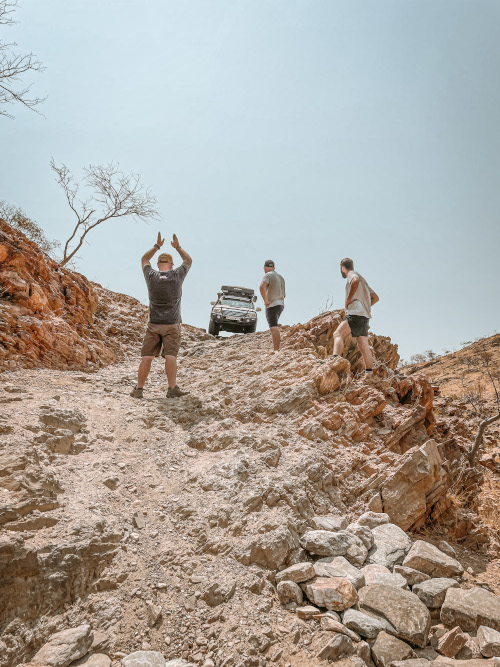
The views from here were spectacular: you can see the valley and the Marienfluss below. But we could also see the long stretch of road that still lay ahead. We had originally wanted to camp at the viewpoint but because of time constraints decided to push on. I wouldn’t recommend camping here in any event. We subsequently learned (first-hand account) of a robbery that occurred here at night just a week before we passed through. This was the second police case opened in a few weeks.
The stretch of pass just after the viewpoint is probably the most dangerous section. It’s only a few hundred metres but there are literally wrecks of cars lying at the bottom of the gorge! This stretch is a steep rockface with a nasty off-camber bit at the base. Pick your line carefully and use a spotter. This is followed by a slippery off-camber section. Please do yourself a favour and watch episode 2, words can’t do this justice! We slowly tackled this last section, reaching the bottom of the pass in the late afternoon.
Lesson 3: You can’t always believe what you hear
Get input from other travellers and locals but you can’t take that as gospel. We had several reports of “really bad” roads where they were quite okay. Then, conversely, a section described as “it will only take a couple hours” taking the whole day. Perceptions differ and conditions obviously change over time. Prepare as much as you can but, in the end, you’ll see what it’s like when you get there.
The route from Rooidrom
We still had around 64km to go to our next camp, Marble Community Camp. The Marienfluss is absolutely breathtaking! It was a real shame we were pushed for time as we definitely wanted to spend more time here. There are no campsites in this area and, as it’s a conservancy, you’re not allowed to wild camp either. The golden grassy landscape eventually became otherworldly, but the corrugations were nasty. It was sunset when we arrived at the historic Rooidrom intersection.
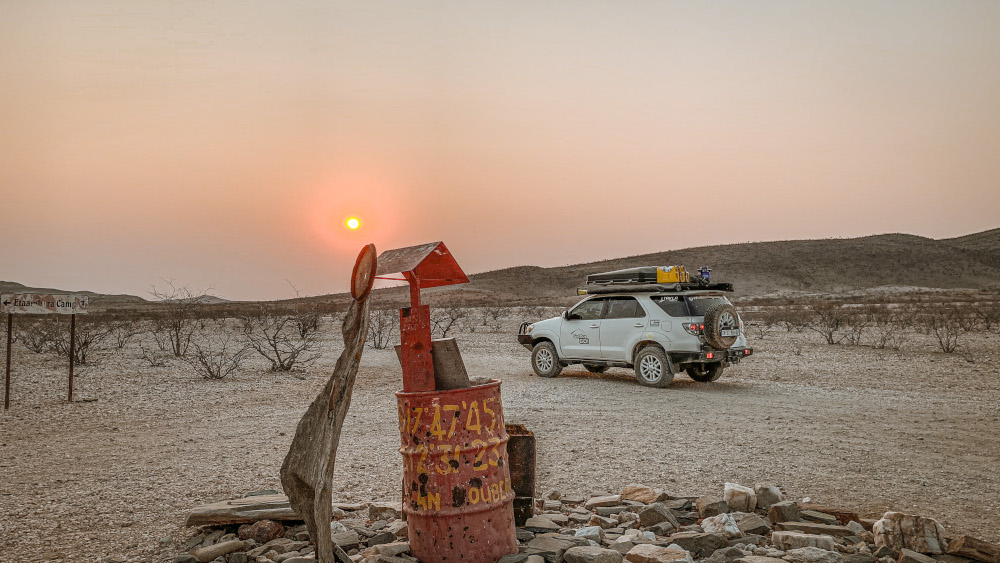
Once we caught our breath at Rooidrom, it was time to get moving as it was growing dark. My GPS indicated that we should carry on straight. The other two GPS units (with the same maps and settings) said to turn left. Since the Marble Camp sign also indicated left, we went left. The roads were very rocky and corrugated and we were surprised to find ourselves on Rooidrom Pass. This pass also has some very steep, rocky sections and I definitely wouldn’t recommend taking this route at night. When Ed hit a washout, it damaged his steering rack, causing it to lose steering fluid fast. Fortunately, we had ATF on hand, so stopped frequently to top it up. But it meant he was slowly losing power steering, not ideal on a 4×4 trail. We finally reached Marble Camp at around 8-9pm, finding the last open campsite.
Lesson 4: Take a breath and check your paper map
It turns out there is another road down to Marble Camp that bypasses Rooidrom Pass. We always take Tracks4Africa paper maps along on our journeys as well. We should’ve taken a moment and checked the map when we received conflicting instructions. Also check your GPS settings for avoidances, fastest time vs. shortest route and that you have the correct map selected. Don’t select both Tracks4Africa and Garmin maps at the same time either.
Limping on to Puros
At Marble Camp, we discovered that we had a fairly big problem. Ed’s steering fluid was leaking into the boots of the control arms. This meant the steering rack was damaged beyond our repair capabilities. Although there is a mechanic at Puros, it was highly unlikely he’d have the necessary parts for the repair job. Through most of this trip we had little or no mobile signal. We usually get local SIMs of the countries we’re travelling in but we also have Garmin InReach (satellite text messaging) and a satellite phone. Puros is also the only place en route where you’ll find fuel. You have to arrange with a gentleman prior to arrival and pay cash. Not cheap and we also found, subsequently, not the cleanest fuel either as it’s stored in drums and dispensed in jerry cans.
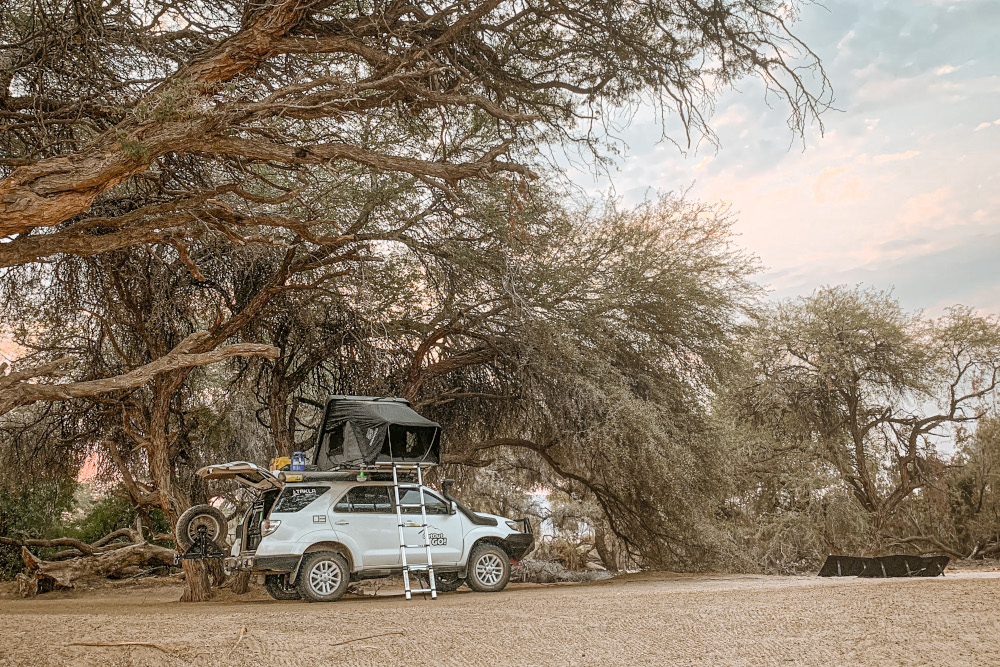
We limped on with the failing power steering with the plan of eventually reaching Kamanjab (en route to Etosha). Because Kamanjab has an auto shop and the possibility of getting parts from Tsumeb, it was our best hope. The corrugations on the D3707 were awful – this road literally shakes loose your fillings! At Omenje Camp on the banks of the (dry) Hoarusib River, we were met with nice shady campsites, running water and donkey-power hot-water showers. For the next two days, we took it easy as we were knackered.
On the road to Kamanjab
Etosha was calling and we headed further south down the D3707 via Sesfontein and Palmwag. The plan: to get to Kamanjab, where we could check out the steering rack issue and restock. But as we turned onto the C40, Ed picked up some smoke coming out of the engine bay. First thought was it must be steering fluid leaking onto the exhaust or something. It wasn’t… there was a crack in his radiator! Because it was a fine crack, Ed sealed it with a bar of Sunlight soap, an old trick. That seemed to work, so we were on our way again. However, on the Grootberg Pass, a plume of steam bellowed out of Ed’s engine bay. The radiator had split right down the middle, there was no fixing it.
A phone call to the mechanic in Kamanjab revealed that to flatbed the 100 series there would cost N$30,000! We decided to tow the vehicle ourselves instead. It’s an automatic transmission though. According to Toyota, you have to put both the gear and transfer case in neutral to tow it. But you can go no faster than 10km/h and you have to stop for 20 minutes every 10km. (Incidentally, we found out after the fact that you can actually tow this vehicle at normal speed. To do so, you place the gear in P and transfer case in N.)
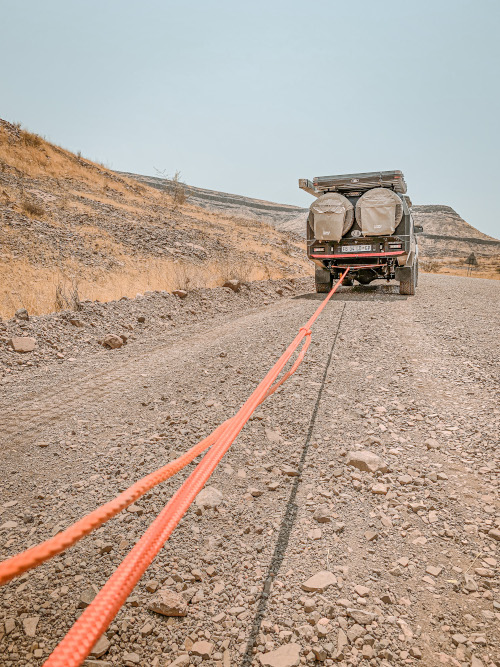
Plans made
I hooked up Ed’s trailer and Ryan towed the 100 with his Ranger. Fortunately, we always have recovery gear on hand and have rated recovery points. We headed for the nearest camp, Hoada, some 70km away. As there was no radiator available in Namibia, we would have to get a spare from South Africa via Tsumeb. The mechanic in Kamanjab would receive the part and come out to Hoada to replace it. It could potentially take seven days for the part to arrive. Would this be the end of Ed’s trip?
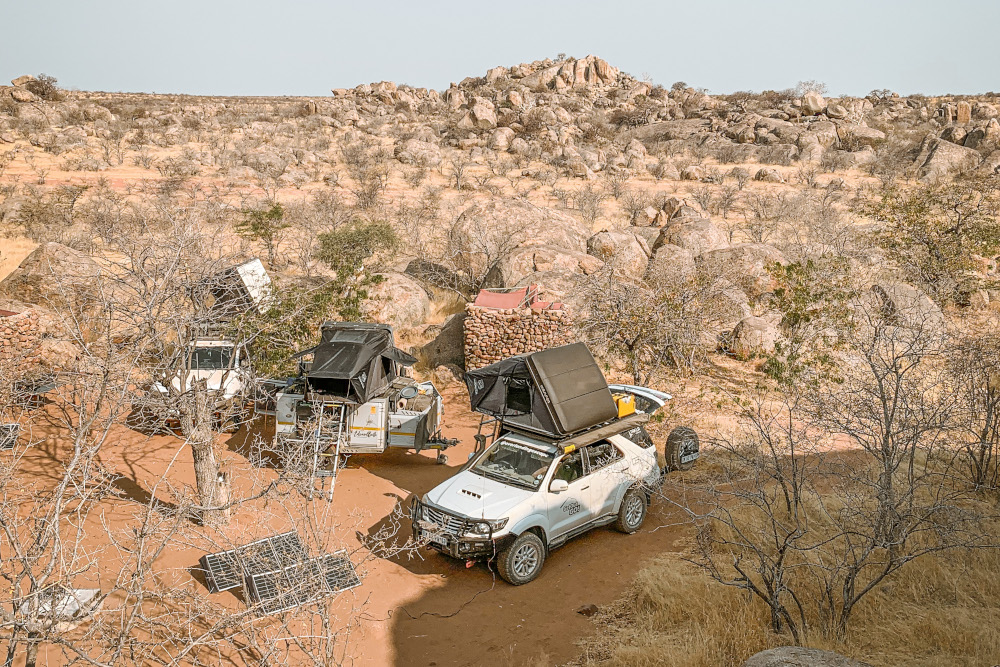
Hoada Camp turned out to be a great spot, thankfully. We decided we would leave the 100 here and Ed would continue with us to Etosha. We could then return to fetch the 100 once the radiator was replaced. Thanks to Bob and team at Hoada for a great stay and looking after the vehicle! I hooked up Ed’s trailer and Ed hitched a ride with Ryan and so we were off to Etosha.
Lesson 5: Keep calm and carry on
Be prepared and have spare parts, tools to fix problems, enough provisions and remote communications capabilities. Make peace with the fact that sometimes you can’t immediately fix a problem though. Take a moment to regroup and you’re bound to find a solution or workaround. Stuff happens – you can’t control it but you can control how you react to it.
Etosha and the end
We spent around a week in Etosha as we had to wait for the repairs to be completed. The game viewing was amazing but the camping was so-so to be honest. The roads inside Etosha were also terrible. I ended up snapping off both my bonnet hinges and had some other damage I didn’t notice till later. I had to weld the hinges at Halali Camp as there was only one new hinge available in all of Namibia. The plan was to send the hinge to Tsumeb and deal with it at the same time as Ed’s power steering. After the 100’s radiator had been replaced, Ed and Ryan collected the vehicle and we set off for Tsumeb the next day.
As there were no steering rack parts available in Namibia, Tsumeb Toyota did a workaround. This meant Ed had no power steering but at least the steering pump wouldn’t seize. He could drive it back to South Africa like this – much cheaper than flat-bedding it out. At this point, we were effectively out of time and budget so had to find the shortest way back. We stocked up with fresh meat and produce at Tsumeb and stayed over at Zuri, a lovely little camp.
Our plan was to travel south to Windhoek, then east to the Buitepos Border Post. From there we would head south through Botswana via the Trans-Kalahari Corridor.
Homeward bound
The Trans-Kalahari Corridor is a great road but long with vast empty spaces. It was late afternoon by the time we reached Kalahari Rest, another great campsite. That evening we had a thunderstorm of note, which is when things turned ‘interesting’ for me. As we were about to leave the next morning, my car wouldn’t unlock. After unlocking manually, I discovered that the central locking didn’t work, along with a whole bunch of other electronics.
It turned out that when the hinges broke off, my dual battery bracket also broke loose and pinched a terminal wire. When the thunderstorm hit, water got into the engine bay (because the welded hinges weren’t aligning perfectly). This caused a short between the pinched positive terminal wire and negative earth on the body, resulting in a fire. In turn, this cooked the main wiring harness so I basically had no electronics. Although the car still started, it had no ABS, lights, brake lights, indicators, air conditioning or power windows. I had to drive like this for nine hours in 40-degree heat but we made it home under our own steam at least. It could’ve been a lot worse.
Final thoughts
On these adventures, things are bound to go wrong. It’s really important to have the right perspective on things. Yes, it might not be fun when things go pear shaped but with the right attitude you can still have a great adventure. You will certainly have some great stories to tell afterwards – these are usually the trips you remember.
Christoff Eilerd is the adventure filmmaker behind Get Out, GO! on YouTube. Along with @4x4ventures_sa and @edwardbath, @get.out.go makes up @overlandingescape.
For the lowdown on Namibia’s top sights and places to stay, depend on our Namibia Self-Drive Guide. It covers destination descriptions, accommodation listings, trip planning and vehicle preparation. The guide also features atlas maps for convenient route planning and navigation. In short, it has all you need for an overlanding expedition to Namibia.

Thank you so much for this article. We slept on the viewpoint of Marienfluss in june 2022. I’m so sad to hear that people have been robbed there.
I am learning so much from you guys. Such intrepid adventures.
Thank you for sharing this incredibly helpful blog post! Your insights and tips have truly made a difference in my travel planning. I appreciate the effort you put into creating such valuable content. Keep up the fantastic work!”
I did Van Zyls pass 2 times with total of 5 vehicles first in 2002 en again in 2006 and slept over before the pass en then at Camp Syncro then back over Rodrom Pass to Puros and Ongongo
A bucket-list tick – done twice. There’s nothing wrong with your appetite for adventure.
A most interesting article. Well written, with excellent and diverse photographs. Invaluable for someone who might want to do something similar, possibly us.
We have just returned to Port Elizabeth from a trip (with 2 couples from Windhoek) to Damaraland and Kaokoland. Puros, Marble Camp, van Zyls Pass Camp,Heartbreak Hill (from west to east and the name is appropriate! the 60 km from camp to the Epupa main gravel road took us 8 hrs), Epupa – all bring back good memories.
Re gps and T4A paper maps- 2 vehicles had T4A gps. I had T4A paper map and the app/T4A map on my phone (which does NOT need cell signal to show you where you are on the map). This worked much better than the gps, which on several occasions led the other 2 vehicles astray, with our basic system, including getting the big picture on the paper map, saving the day.
Bottom line – use your paper map!
Even in this age of technology, paper maps remain indispensable. Thanks for sharing your experience.